크롤링, 웹 스크레이핑을 하려면 BeautifulSoup로 html을 파이썬 객체로 parse를 해줘야 합니다. html xml 파일은 str 형태이기 때문에 ajax 할 때 responsetext로 가져온 것처럼 말이죠!
오늘은 단계별로 나눠서 BeautifulSoup와 requests 파이썬 라이브러리를 활용하여 크롤링을 어떻게 해야 하는지 알아보겠습니다.
일반적인 텍스트 크롤링 방법 : text scraping
시작 전: BeautifulSoup, requests 설치
CLI 창에$ pip install beautifulsoup4$ pip install requests
BeautifulSoup 란?
- HTML, XML 파일로부터 원하는 데이터를 가져오기 쉽게, 비슷한 분류의 데이터별로 나누어주는(parsing) 파이썬 라이브러리
- html을 python object 로 만들어줘야 우리가 파이썬 언어로 가져온 데이터를 활용할 수 있다
- 참고 : https://www.crummy.com/software/BeautifulSoup/bs4/doc/#
0) 코드 시작: import 할 것들
from bs4 import BeautifulSoup
import requests # urllib.requests 대신 사용
일단 파이썬 라이브러리 임포트 해 와야 사용할 수 있음.
1) 크롤링 하고 싶은 url 요청 후 응답받기
url = 'https://novel.naver.com/webnovel/weekday' # 요청
resp = urllib.request.urlopen(url) # 응답
print(resp) # <Response [200]> 응답객체- 여기서 resp는 응답받은 객체 (response object)를 변수에 저장하는 것 - 현재까지는 문자열 상태
urllib.request.urlopen(url): url로는 properly encoded URL, 또는 Request object를 패스할 수 있음
2) BeautifulSoup 사용하기
soup = BeautifulSoup(resp.text, 'html.parser')
# 문자열로 된 객체를 python object로 변환
BeautifulSoup(markup, "html.parser")- parsing 하기 위해 BeautifulSoup의 html parser를 사용해서 soup라는 변수로 저장
- html 외에도
BeautifulSoup(markup, "lxml")등으로 파싱 가능
BeautifulSoup Methods
위의 단계까지 했으면, 여기서부터는 아래의 BeautifulSoup 메서드들을 사용해서 원하는 기능을 구현하면 됩니다!!
- html의 경우 태그로 데이터를 가져올 수 있다 :
soup.head,soup.title,- 특정 태그 가져오기도 가능 :
soup.body.b # 결과 : <b>The Dormouse's story</b>soup.a # <a class="sister" href="http://example.com/elsie" id="link1">Elsie</a>
- 자녀 태그 가져오기 :
.content,.children - 자손 태그 가져오기 :
.descendants
- 특정 태그 가져오기도 가능 :
- Searching: Find 찾기
- .find(), .findall() 차이는 하나의 객체로 리스트로 가져오는지이다. 그래서 아무것도 찾지 못했을 때 find는 None을 반환, findall은 []를 반환한다
.find(name, attrs, recursive, string, **kwargs): result 하나만 반환.find_all('b') # [<b>The Dormouse's story</b>]: 리스트로 반환soup.find_all(["a", "b"]) # [<b></b>, <a></a>...]: a, b 태그를 리스트로 가져옴.find_all(True): 모든 태그를 가져옴 (string 제외)find_all("p", "title"):tag with the CSS class “title”soup.find_all(string=["Tillie", "Elsie", "Lacie"]) # ['Elsie', 'Lacie', 'Tillie']: string으로 찾기soup.find_all("a", class_="sister")
- Searching: CSS Select 찾기
soup.css.select("body a")soup.css.select("p > a")
제가 연습한 크롤링 과제에서는 json 파일로 저장까지 하기 위해 아래와 같이 메서드들을 사용해 보았습니다:
item_list = soup.find('div', class_='component_section').find_all('li', class_='item')

novel_list = list()

for i in item_list:
    title = i.select('span[class="title"]')[0].text
    rank = i.select('.rank')[0].text

    temp = dict()
    temp['title'] = title
    temp['rank'] = rank
    novel_list.append(temp)

result_dict = dict()
result_dict['novels'] = novel_list
이렇게 하면 result_dict라는 변수에 {'novels': [{'rank': 1, 'title': '오늘은 뭐 먹지'}, {'rank': 1, 'title': '자취방 요리'}, {}{}....]} 형태로 저장이 됩니다. 이것을 json으로 덤프 해주었습니다.
json 파일로 만들기
- JSON : JavaScript Object Notation
json.dumps(dict, ensure_ascii=False)- ensure_ascii 부분은 False로 설정해야 한국어가 깨지지 않음 (false = 아스키에 포함되지 않는 문자들도 모두 출력하도록 함)
- 대용량 데이터도 가볍게 만들어서 주고받기, 해석하기 쉽고, XML과 비슷하지만, parsing 하기가 더 쉬움
- 파이썬 딕셔너리와의 차이점 딱 하나! JSON은 "", dict는 ''
result_json = json.dumps(result_dict, ensure_ascii=False)

with open('novels.json', 'w', encoding='utf-8') as file:
    file.write(result_json)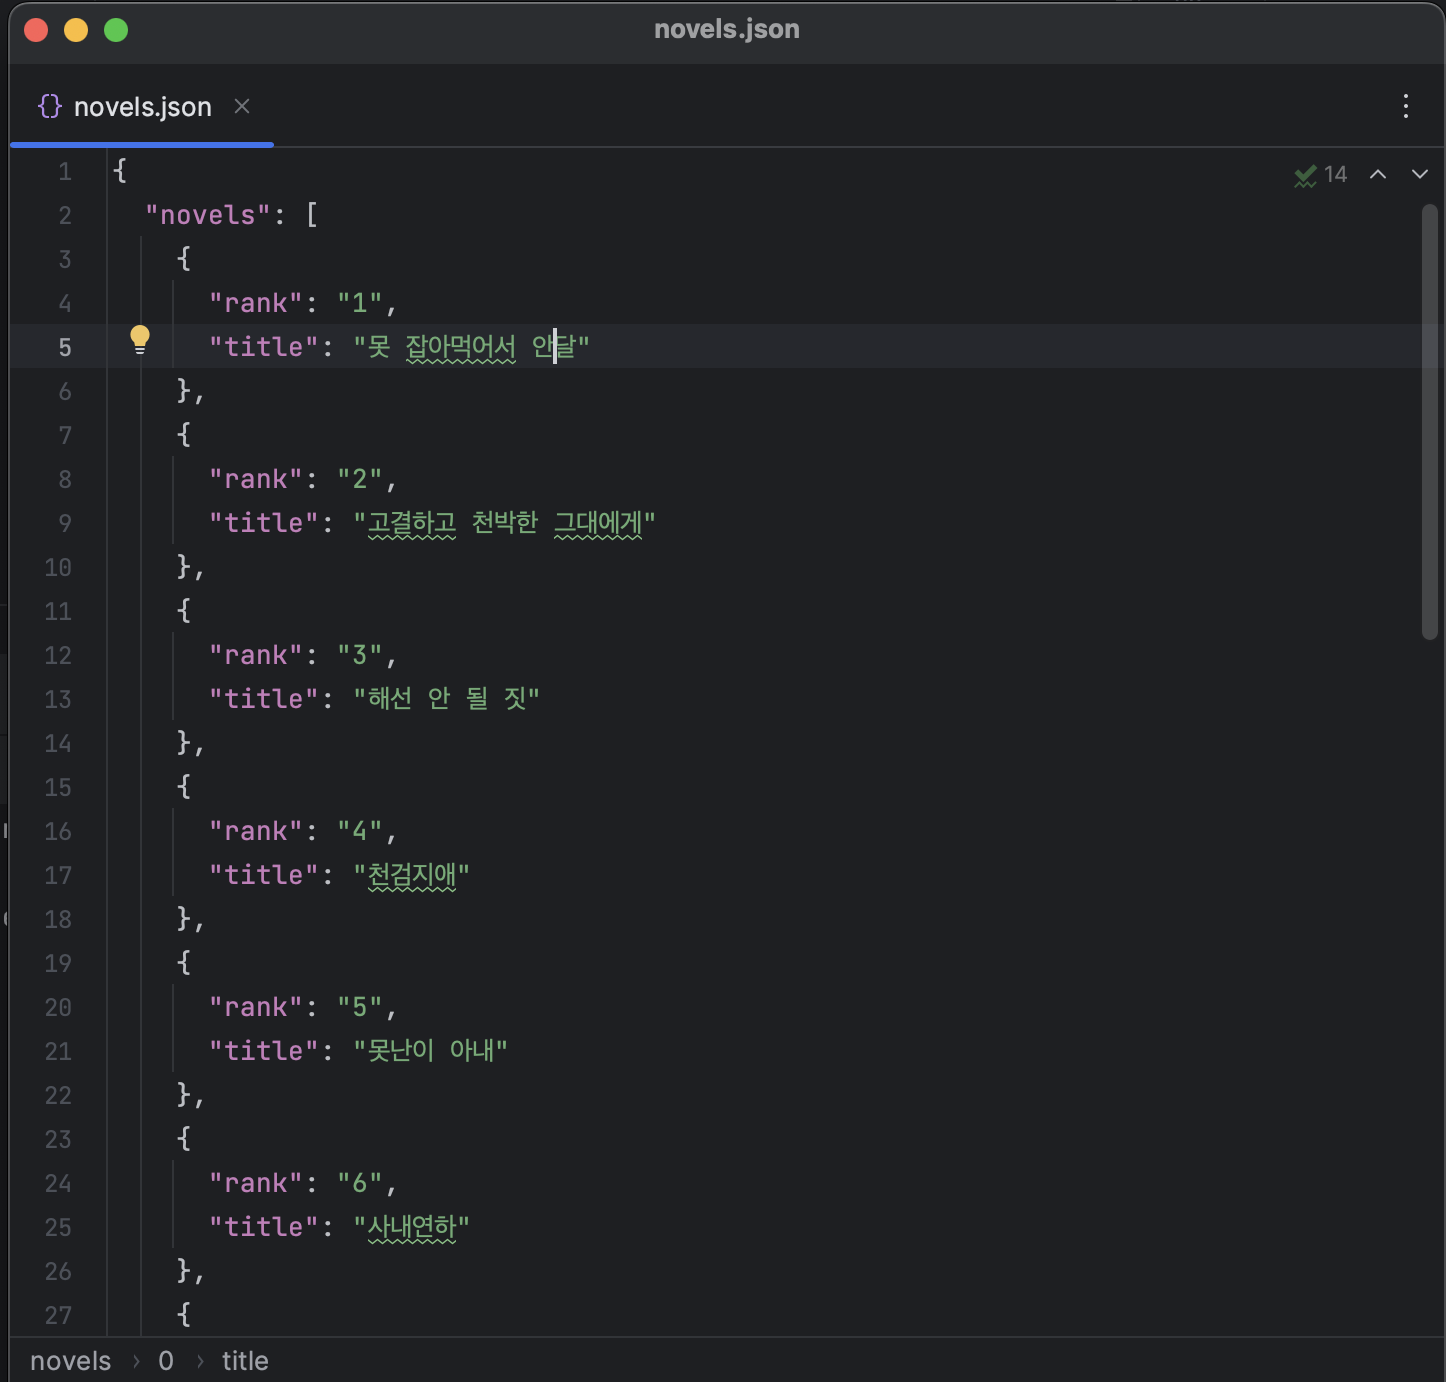
여기까지 하면 json 파일로 저장이 된 것을 확인할 수 있습니다. json 파일로 저장하는 이유는 데이터를 나중에 사용하기 편하게 하는 것입니다.
'Data Science' 카테고리의 다른 글
| [HTML/DJANGO 웹개발 기초] GET, POST 방식 차이 예시 (0) | 2023.07.05 |
|---|---|
| [Python] 반응형 웹사이트 크롤링 예제 (웹툰, 쇼핑몰) (0) | 2023.06.29 |
| [Javascript] innerHTML, innerText, textContent 차이점 예제 포함 (0) | 2023.06.26 |
| [Python] 웹개발 Django 프로젝트 시작하기 코드 포함 (0) | 2023.06.25 |
| [Django] 파이썬 웹 개발 기초 개념, 장고 프로그래밍 (0) | 2023.06.24 |


